Let's Encrypt 域名证书增强网站安全
唠唠闲话
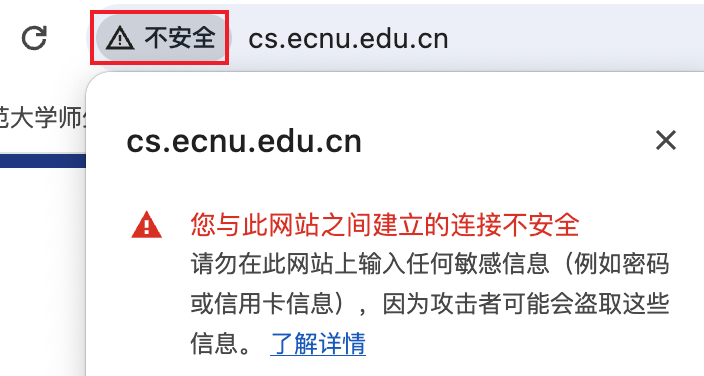
在网页浏览过程中,你可能遇到过浏览器显示网站不安全的警告,原因是该网站使用的是 HTTP 而非 HTTPS 协议。

如果你在 HTTP 网站上输入了个人信息,如用户名、密码、信用卡号等,这些信息在传输过程中可能被窃取,继而被用于恶意行为。HTTPS 协议通过 SSL/TLS 对数据加密,保护了用户的隐私和安全。
虽然市面上提供 SSL 证书的机构众多,如阿里云、腾讯云等,但这些证书往往收费、限额且配置繁琐。此时,Let’s Encrypt 以其免费、开放且自动化的特点成为了优选,它由 Linux 基金会管理,为众多网站提供了便捷的 HTTPS 加密解决方案。
本文旨在介绍如何使用 Let’s Encrypt 生成免费的泛域名 SSL 证书。
环境和工具
我们将在 Ubuntu 20.04.6 LTS 系统上,利用 Nginx 和 Certbot 工具进行测试。Nginx 用于反向代理,Certbot 负责获取和续签 SSL 证书。
1 | ❯ uname -i |
安装 Nginx 和 Certbot:
1 | # 安装 Nginx |
配置 SSL 证书
本节分为配置单域名证书和泛域名证书两部分,以 example.com 为例进行说明。
单域名证书
假设你要为 test.example.com 配置证书,首先将该域名解析到服务器公网地址,然后执行命令:
1 | sudo certbot certonly --nginx \ |
Certbot 命令包含了几个参数,以下是详细说明:
certonly: 用于获取证书,但不自动配置 web 服务器来使用新的证书。这在希望手动管理服务器配置或者使用它进行测试的时候有用。--server https://acme-v02.api.letsencrypt.org/directory: 指定 ACME 服务器的 URL。这里使用的是 Let’s Encrypt 的 ACME v2 服务器地址。ACME(Automated Certificate Management Environment)是获取、续订以及撤销 SSL 证书的协议。--agree-tos: 通过这个参数,同意 Let’s Encrypt 的服务条款,省去确认步骤。-d test.example.com:-d参数后面跟的是你想要为其获取 SSL 证书的域名。可以为多个域名获取证书,通过为每个域名重复-d参数实现。--nginx: 使用 Nginx 插件来自动完成验证过程和配置更新。
执行后,证书将生成并保存至 /etc/letsencrypt/live/test.example.com/,同时 Certbot 会自动设定定时任务以便证书续签:
1 | Successfully received certificate. |
泛域名证书
泛域名(Wildcard Domain)指包含通配符 (*) 的域名,用来匹配一个域名下的多个子域名。其中 * 只能出现在首位,且以 *. 的形式,匹配只匹配一级,比如 *.example.com 可以匹配 test.example.com,但不能匹配 test.sub.example.com。
泛域名证书允许我们为多个子域名使用同一个证书。以 *.example.com 的泛域名证书为例,执行以下命令:
1 | sudo certbot certonly --manual --preferred-challenges=dns -d "*.example.com" --agree-tos --server https://acme-v02.api.letsencrypt.org/directory |
和前边相比,增加了两个参数:
- --manual: 手动模式,需手动执行一些步骤,例如添加 DNS 记录。
- --preferred-challenges=dns: 使用 DNS 验证域名所有权。
此过程需要手动添加 DNS TXT 记录以验证域名所有权。证书颁发后,将保存在 /etc/letsencrypt/live/example.com/。
注:可以用 cloudflare 托管域名,然后就能自动进行 DNS 验证并更新证书,当前暂不考虑。
使用和更新证书
使用证书
在 Nginx 配置文件中引用证书,以开启 HTTPS 支持:
1 | server { |
如果希望拷贝证书文件,可以用 cat 命令:
1 | sudo cat /etc/letsencrypt/live/test.example.com/fullchain.pem > $HOME/test.example.com.pem |
注意,/etc/letsencrypt/live/ 目录下的证书是符号链接,指向 /etc/letsencrypt/archive/ 目录下的真实证书文件。如果要用 cp 命令拷贝证书,需要拷贝 /etc/letsencrypt/archive/ 目录下的文件。
更新证书
Let’s Encrypt 证书的有效期为 90 天,需定期更新。使用以下命令可自动续签所有证书:
1 | sudo certbot renew --dry-run |
renew 命令的设计初衷是自动续签所有已安装且即将到期的证书,而不是单独续签指定的域名证书。如果要强制更新某个域名,可以使用 --force-renewal 参数。
1 | sudo certbot certonly --force-renewal -d test.example.com --nginx |
为实现自动更新,可设置 crontab 定时任务。
1 | sudo crontab -e |
注意,泛域名证书涉及手动 DNS 验证,更新较为复杂。如果想自动更新,可以考虑 Certbot 的 DNS 插件,配合 Cloudflare 托管域名。
管理证书
更新域名证书时,如果证书已存在,可能会生成多个证书文件。可以通过以下命令查看证书列表:
1 | sudo certbot certificates |
然后删除某个证书:
1 | sudo certbot delete --cert-name example.com |
结语
以上提供了一个使用 Let’s Encrypt 配置泛域名 SSL 证书的简明指南,帮助提升网站的安全性和可信度。


