Oh-My-Zsh 配置教程
唠唠闲话
Oh My Zsh是一个开源的、社区驱动的 Zsh 配置框架,其提供各种功能强大的插件、主题和工具以增强 Zsh 的使用体验。
本篇介绍 zsh 安装及配置方法,其中无 root 安装 zsh 的部分参考了教程《无 root 或 sudo 权限安装 zsh》。
以下内容已写成脚本,可以通过下边命令一键安装
1 | curl -sSL https://qiniu.wzhecnu.cn/scripts/oh-my-zsh-p10k.sh | bash |
安装 zsh
输入 which zsh 检查是否已安装 zsh,若已安装则跳过本节。
sudo 用户直接运行
1 | sudo apt install zsh |
非 sudo 用户的安装比较繁琐,需手动编译,具体步骤如下。
下载安装包并解压
1 | # cd download # 进入待下载目录 |
编译安装
1 | cd zsh-5.9 # 进入解压后的目录 |
这里 --prefix 用于指定安装路径,根据自己的需要修改。然而第二步 configure 通常会提示无 ncurses 依赖
1 | configure: error: "No terminal handling library was found on your system. |
如果出现 ncurses 依赖错误,需按下边步骤将 ncurses 装上:
设置环境变量,在 .bashrc 中添加变量,并执行 source ~/.bashrc 更新
1 | export NCURSES_HOME=$HOME/software/ncurses |
其中 NCURSES_HOME 为 ncurses 的安装路径,根据自己的需要修改。
安装 ncurses
1 | wget https://ftp.gnu.org/pub/gnu/ncurses/ncurses-6.2.tar.gz |
安装完成后,重新执行编译安装:
1 | cd zsh-5.9 |
配置 oh-my-zsh
-
克隆仓库到主目录
1
git clone https://github.com/ohmyzsh/ohmyzsh.git ~/.oh-my-zsh
-
将
templates目录下的配置文件拷贝至.zshrc即可1
cp ~/.oh-my-zsh/templates/zshrc.zsh-template ~/.zshrc
-
配置高亮,自动提示和补全的插件
1
2
3
4ZSH_CUSTOM=~/.oh-my-zsh/custom
git clone https://github.com/zsh-users/zsh-syntax-highlighting $ZSH_CUSTOM/plugins/zsh-syntax-highlighting
git clone https://github.com/zsh-users/zsh-autosuggestions $ZSH_CUSTOM/plugins/zsh-autosuggestions
git clone https://github.com/zsh-users/zsh-completions $ZSH_CUSTOM/plugins/zsh-completions然后执行
1
2
! grep -q "autoload -U compinit && compinit" ~/.zshrc && echo "autoload -U compinit && compinit" >> ~/.zshrc
sed -i '/^plugins=/c\plugins=(git sudo z zsh-syntax-highlighting zsh-autosuggestions zsh-completions)' ~/.zshrc第一行判断并添加
autoload -U compinit && compinit到~/.zshrc文件中。
第二行先找到plugins=所在行,将其改为plugins=(git sudo z zsh-syntax-highlighting zsh-autosuggestions zsh-completions)。 -
zsh 隔一段时间会提示自动更新,如果要禁用,可在
~/.zshrc文件中这行注释掉:1
zstyle ':omz:update' mode disabled # disable automatic updates
配置主题 p10k
个人常用主题是 powerlevel10k,就以它为例子,其他主题的配置方法类似。
通过 git 下载主题
1 | git clone --depth=1 https://github.com/romkatv/powerlevel10k.git ${ZSH_CUSTOM:-$HOME/.oh-my-zsh/custom}/themes/powerlevel10k |
修改主题为 p10k
1 | sed -i '/^ZSH_THEME=/c\ZSH_THEME="powerlevel10k/powerlevel10k"' ~/.zshrc |
注:这里用了 sed 流编辑器(stream editor):
-i表示直接修改文件/^ZSH_THEME=/表示匹配以ZSH_THEME=开头的行c\紧接要替换的内容
等价地,可以直接打开 ~/.zshrc 文件,找到 ZSH_THEME= 这一行,将其修改为 ZSH_THEME="powerlevel10k/powerlevel10k"。
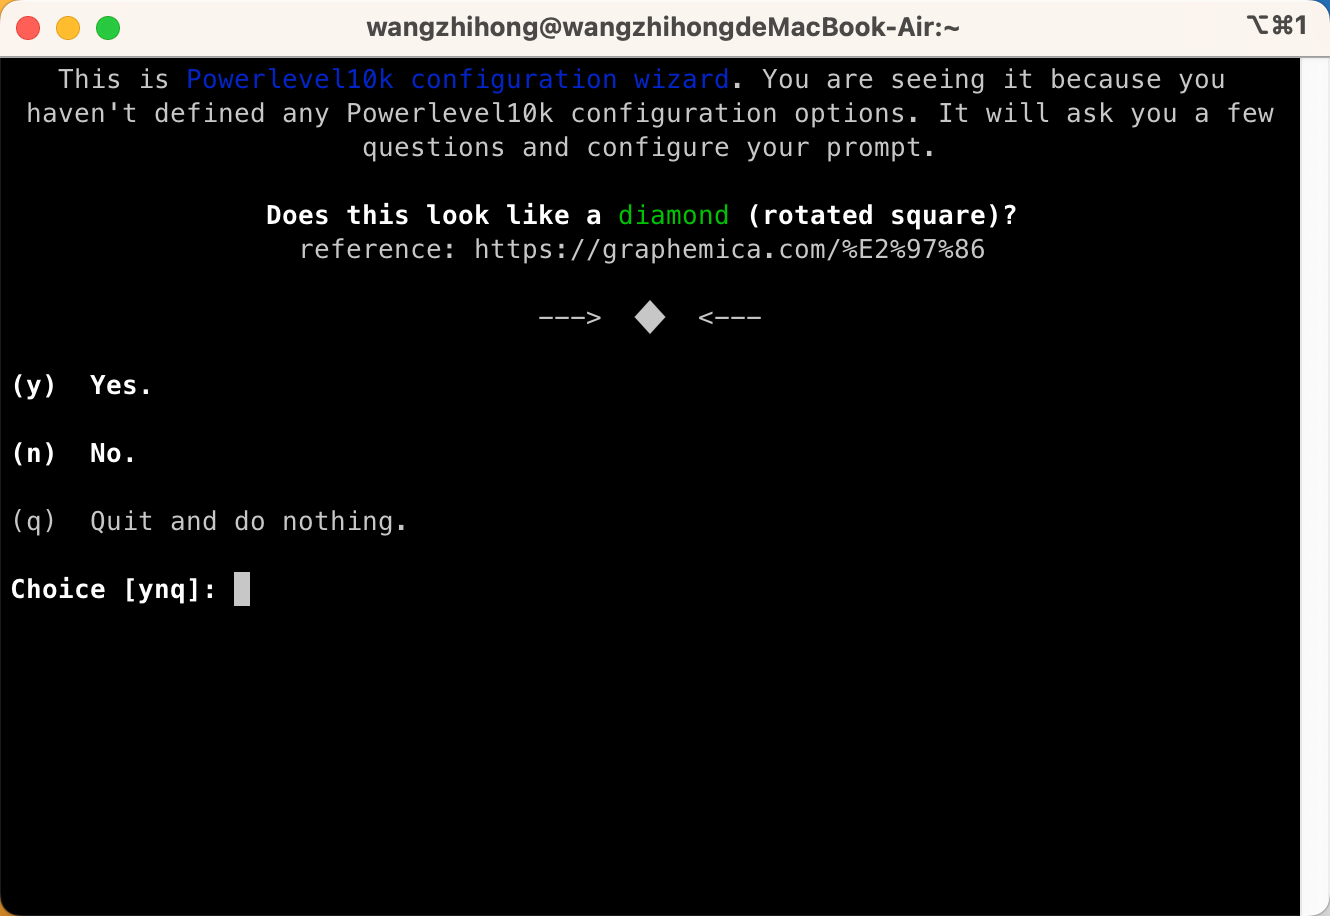
重新运行 zsh 触发配置,根据提示进行,如下图。
更改默认 shell
或者在 .bash_profile 里添加 exec $(which zsh) -l:
1 | changeshell="exec $(which zsh) -l" |
注意事项:用 ssh 连接服务器时,通常会先执行 .bash_profile 再执行 .bashrc 并启动 bash。但一些情况,比如用 vscode 运行 shell 时,可能不经过 .bash_profile 直接启动的 bash。这时可以直接在 .bashrc 里添加 exec $(which zsh) -l,这一来每次启动 bash 都会转成 ZSH。另一种方式是在 vscode 新建终端里直接修改默认终端(推荐)。

除此之外,可以在终端里输入 chsh -s $(which zsh) 更改默认 shell,这一来每次登录默认使用 zsh。
插件配置
其他插件配置,比如 thefuck, autojump,后续补充。
以上,配置遇到问题欢迎讨论~~
 wechat
 alipay